Hanging drywall is fast work with slow consequences. A sheet goes up in two minutes, but a joint in the wrong place, a screw set too deep or a gap at a corner will cost you an hour of finishing later. This guide covers the order of work, how to lay out sheets so you tape as little as possible, how to fasten correctly, and the handful of mistakes that separate a wall you prime once from a wall you keep coming back to.
Before the first sheet goes up
Everything that lives inside the wall has to be finished and signed off first. Once board is on, getting back in means cutting it out.
- Electrical, plumbing and HVAC rough-in complete and inspected where a permit requires it.
- Insulation in, and any vapor barrier or air sealing done.
- Blocking added wherever you will later hang something heavy: cabinets, grab bars, a wall-mounted TV, towel rails.
- Protector plates over any pipe or cable that sits within 1-1/4 in of the stud face.
- Framing checked for crowned or twisted studs. Sight down each one and replace the bad ones now.
Then mark stud and joist centers on the floor and ceiling plates with a pencil. Once board covers the framing, those marks are the only thing standing between you and a row of screws that missed.
Let the board acclimatize in the room for a day or two if it has come from a cold truck. Paper facing that is damp or cold takes fasteners badly and tears at the edges.
Layout: fewer joints beats faster hanging
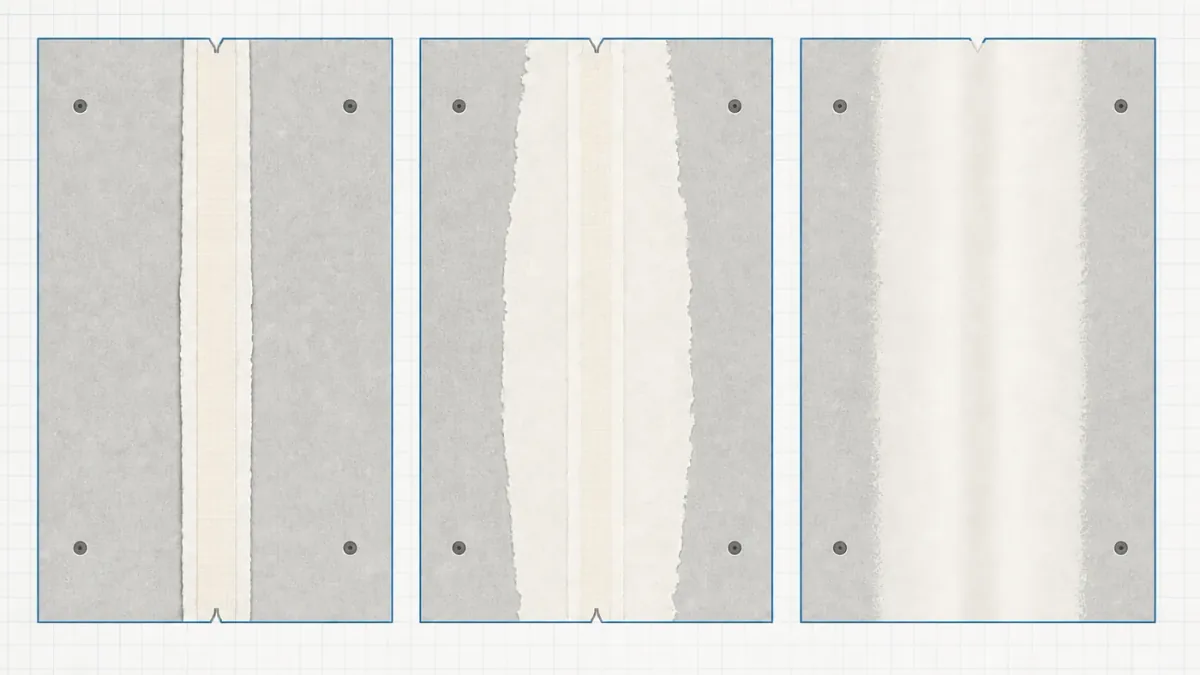
Board comes with two long tapered edges and two square-cut ends. The tapered edges form a shallow trough that swallows tape and compound and finishes almost flat. The square ends form a butt joint, which has no recess at all, so the tape and mud sit proud of the surface and have to be feathered out wide. Every layout decision comes back to one rule: make as many joints as possible tapered, and as few as possible butt.
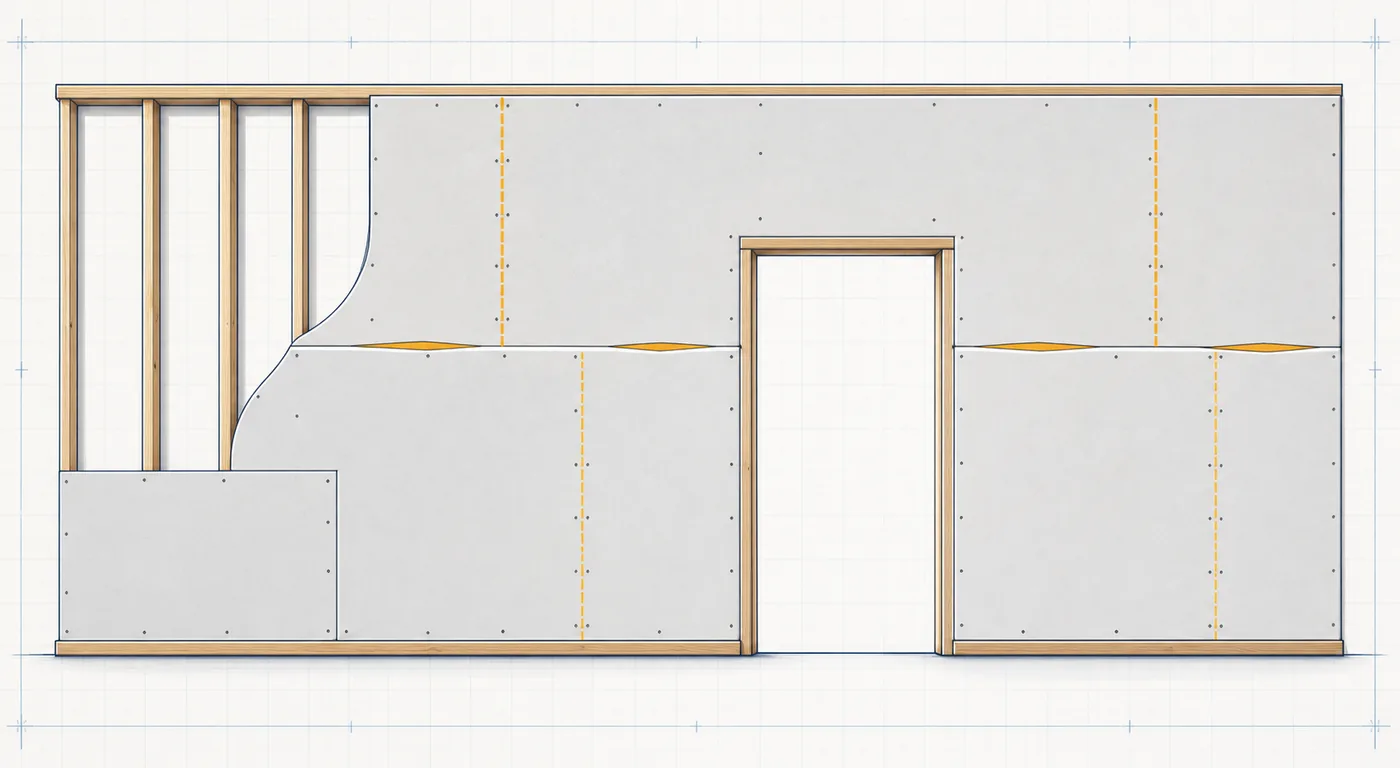
- Use the longest sheet the room and your access will allow. A 4x12 sheet on a 12 ft wall means zero butt joints.
- Run sheets horizontally on walls in most residential work. It puts the long tapered seam at a comfortable height and crosses more studs.
- Hang the ceiling first, then the walls. Wall sheets then push up under the ceiling board and support its edges.
- Run ceiling sheets perpendicular to the joists so any variation in joist depth is spread over several members.
- Stagger butt joints between rows by at least one stud so you never create a continuous seam.
- Never let a joint land on the edge of a door or window opening. Cracks start at those corners.
Plan the room on paper first. Sketch each wall, mark the openings, and draw the sheets in. Five minutes with a pencil regularly saves two or three sheets and a lot of taping.
Hanging the sheets
- Start the ceiling in a corner. Use a drywall lift, or make a pair of T-braces slightly taller than the ceiling height so they wedge the sheet up.
- Push the sheet tight into the corner and set a few screws in the field to hold it, then work outward.
- On walls, hang the top sheet first, tight to the ceiling board. Any gap at the top is hidden by the ceiling joint.
- Hang the bottom sheet second and leave a 1/2 in gap at the floor. It keeps the board off any moisture and lets you lever the sheet up tight against the one above with a foot lifter.
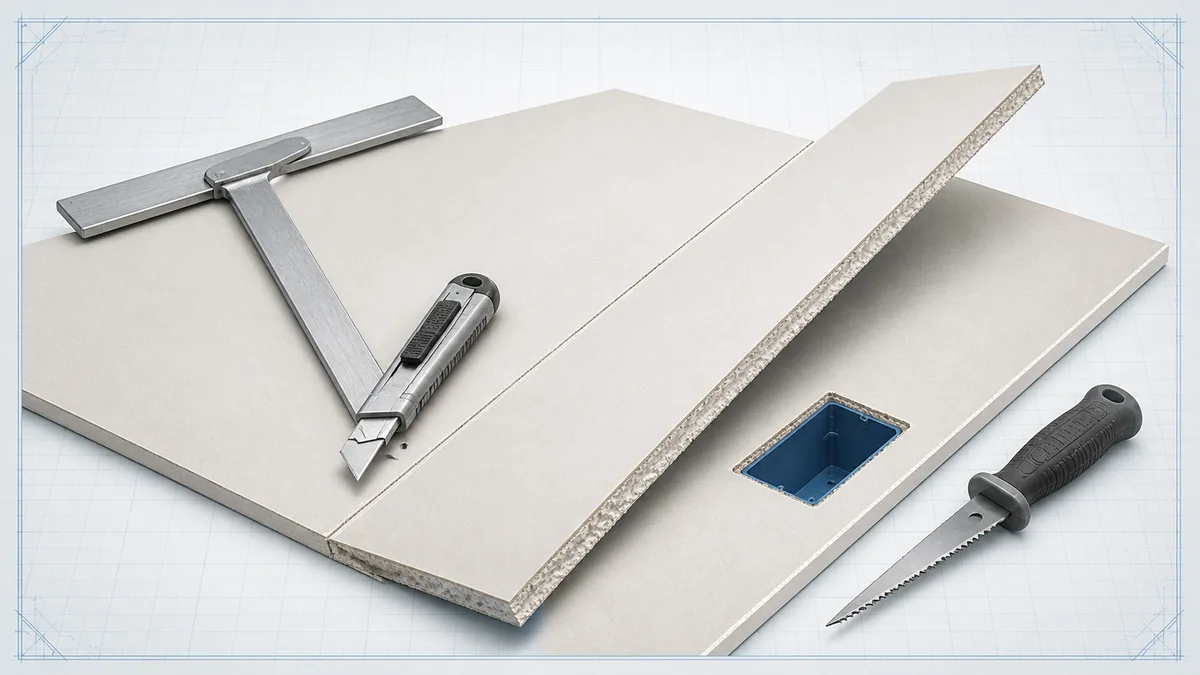
- Cut sheets face up. Score the paper with a utility knife along a straightedge, snap the sheet back over the cut, then slice the back paper.
- Cut outlet and switch openings before the sheet goes up where you can measure accurately, or use a rotary cutter against the box once the sheet is tacked.
- Fit corner bead to every outside corner, fastened every 8 to 10 in.
Sheets should touch but not be forced. A joint jammed together with a hammer will telegraph a ridge through three coats of compound. If two edges will not meet without force, trim one.
Fastening: depth matters more than count
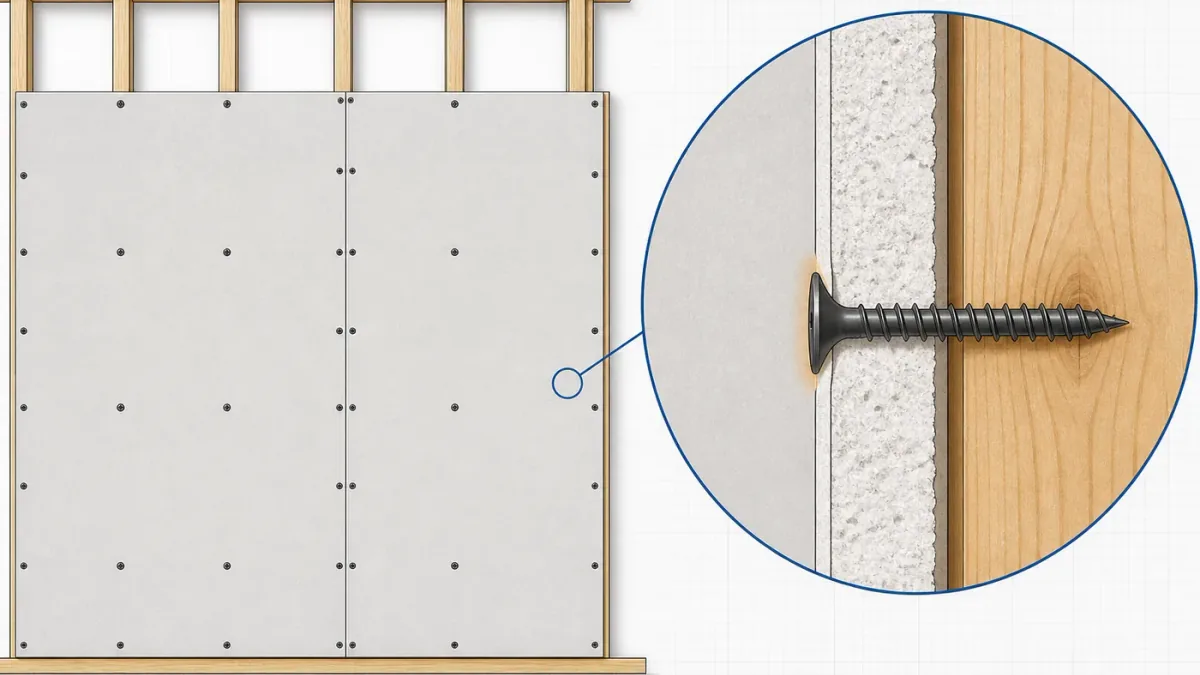
Screws hold board in two ways: friction against the framing and the head bearing on the paper face. Drive one too deep and the head tears through the paper, leaving you with a fastener that does almost nothing and a crater to fill.
- Walls: for a common non-fire-rated single-layer installation with screws only, manufacturer guidance commonly allows 16 in on center. Rated assemblies and some systems require a tighter pattern.
- Ceilings: manufacturer guidance commonly uses 12 in on center for non-fire-rated screw-only installation because gravity works against the board.
- Depth: the head should sit just below the surface in a dimple you can feel with a taping knife but that has not broken the paper.
- Use a screw gun with a depth-setting nose, or a drill clutch dialed in on an offcut first.
- Length: 1-1/4 in coarse-thread for 1/2 in board on wood framing. Fine-thread for steel studs.
- A screw that misses the stud gets removed, not left in. Pulling it and driving a new one an inch away is a two second job.
Our calculator sizes the screw count from the board you are hanging, at one per square foot on walls and 1.25 on ceilings, which lands close to 32 and 40 screws per 4x8 sheet respectively. The fastening pattern itself takes 28 and 35 at 16 in on center; the rest covers dropped and stripped screws.
Six mistakes that create finishing work
- Butt joints in the middle of a long, well-lit wall. Move them behind furniture or out of the raking light if you can.
- Screws driven through the paper. Each one is a fastener that is not holding and a spot that will pop.
- Board tight to the floor. It wicks any spill or damp straight into the gypsum core.
- Joints landing on opening corners, which is where movement concentrates and cracks appear.
- Forgetting blocking, then discovering it when the cabinets arrive.
- Hanging walls before the ceiling, which leaves the ceiling edges unsupported and the corner harder to tape.
None of these are hard to avoid. They are all faster to prevent than to fix, which is the whole argument for spending ten minutes on layout before you pick up the first sheet.
Drywall Calculator
Work out sheets, screws, mud and tape before you order.
Frequently asked questions
Primary references
Manufacturer and industry guidance used to check this article.
- Sheetrock Brand Installation and Finishing GuideUSG
- Application and Finishing of Gypsum Panel Products, GA-216-2010 archiveGypsum Association
Product instructions, tested assemblies and local code take priority over general guidance.